How to Upload a Document to Blackboard
Y'all can create content that combines a multifariousness of materials to view together, such equally text, multimedia, and attachments.
Yous can create a content particular to nowadays a combination of content that serves every bit a handout or document with visual aspects. You can create content items that are as simple as one line of text or include many elements.
For example, in one content detail, you can include introductory text for a lesson, an image for your students to view and interact with, and links to web resources. The materials are all presented together in the content listing. The longer your content detail is, the more your students accept to curl to see all the other materials in the content area.
Create a document
On the Course Content folio, you tin create a document or folio to present a combination of content. For example, yous tin can include introductory text for a lesson, an sound file of a lecture, and an epitome. When students select the document title, the materials y'all added are all presented together on one page. Students see the content just as you see it, without the editing options.
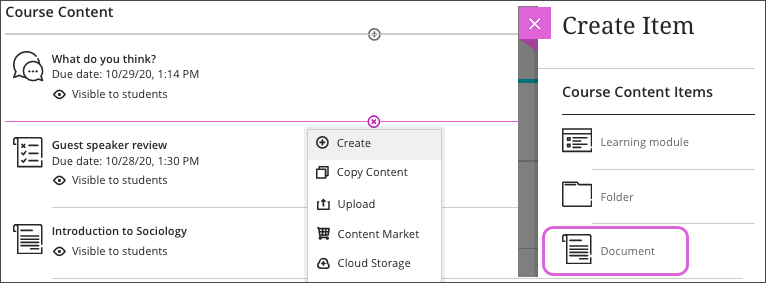
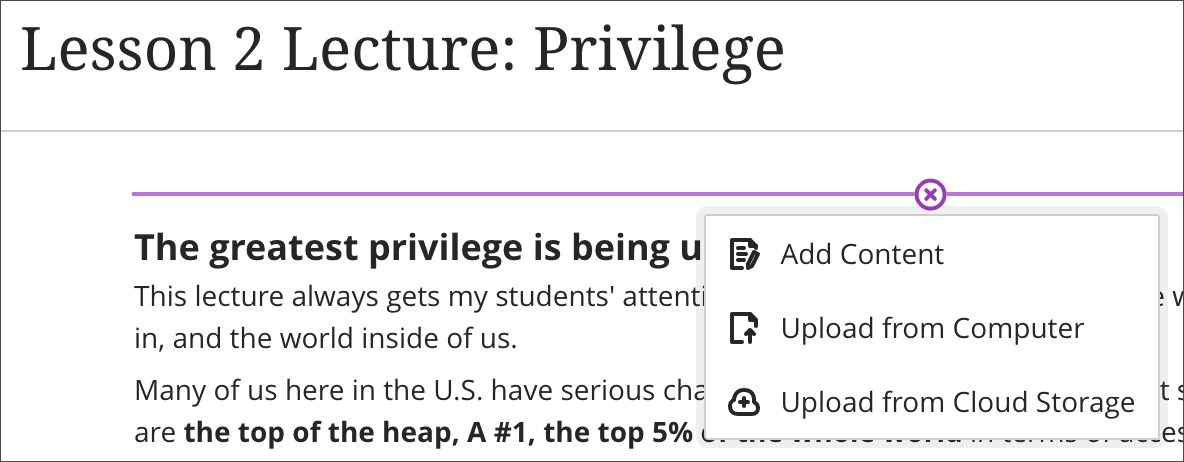
Select the plus sign wherever y'all want to add a document. In the menu, select Create to open the Create Item console and select Document. The New Certificate page opens.
Y'all tin also expand or create a folder or learning module and add a document.
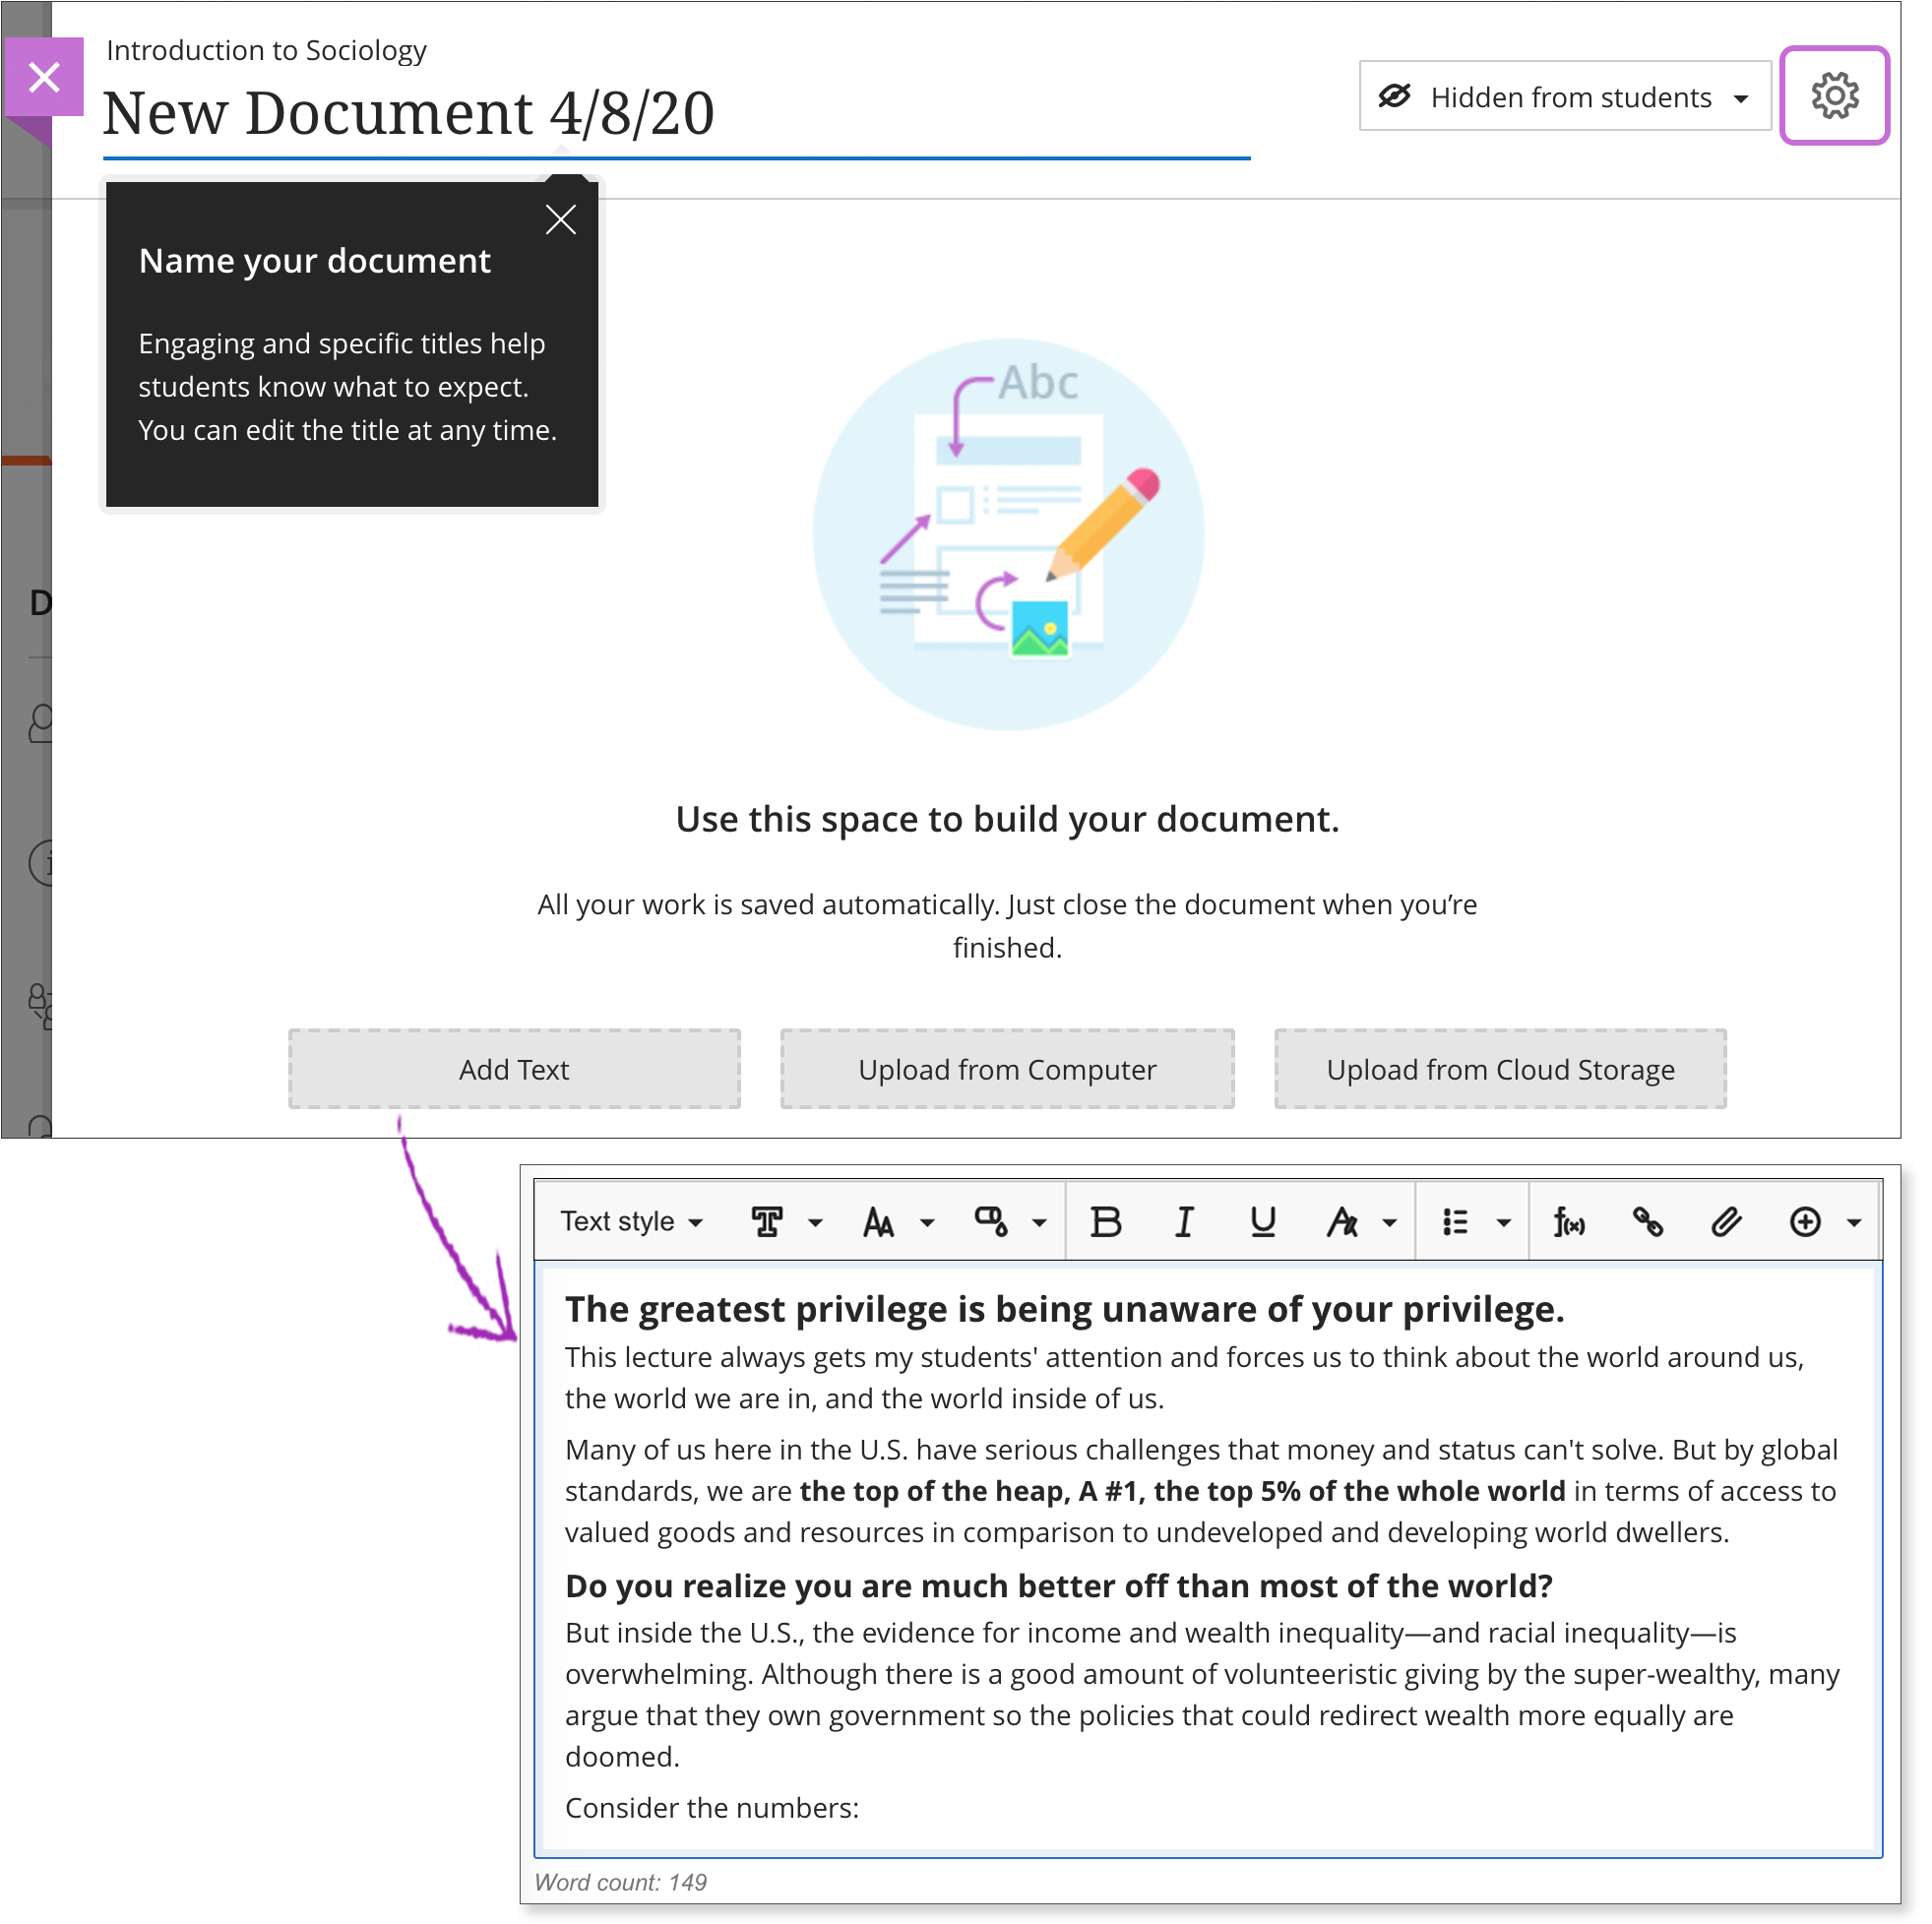
New Document page
On the New Document page, employ the options to add content. You lot can add together every bit many text blocks and files as y'all want.
Upload from Cloud Storage: You can upload files from cloud storage, such as OneDrive® and Google Drive™. When y'all add a file from cloud storage, the system makes a copy of the file in your grade. The files aren't linked. Any change yous make to a file within your course doesn't apply to the file in deject storage. If your browser allows, media files display inline.
- Type a title. On the Grade Content page, the title appears equally the link students select to view the materials. If you don't add a title, New Certificate and the date appear in the content listing.
- Add together text blocks. Select Add Text to open the editor. You can also paste text from a Discussion doc.
You tin can as well use the editor to embed images and attach files along with your text. To use your keyboard to jump to the editor toolbar, printing ALT + F10. On a Mac, press Fn + ALT + F10. Employ the arrow keys to select an option, such as a numbered listing.
- Add files. Select Upload from Figurer and scan for or elevate files from your computer, such as a Give-and-take md and an audio file. You can't add together a binder of items. You're asked if you lot want to add the individual items inside the folder. Your institution controls the maximum size of a file that yous can upload.
-
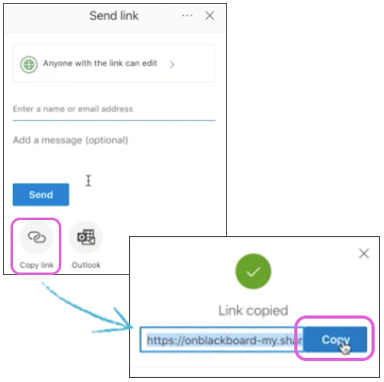
Add Part 365 files.Yous can embed enterprise Office365 files direct into your content. Select Share in your Office365 file to create a link to the file. Choose which permissions you desire the user to have and select Re-create Link. This copies the link to your clipboard. To embed the content, selectInsert/Edit Media from Web from the editor. Paste the link in Media URL.Select Insert.
- Testify or hide the document. Students tin can't run into a certificate until yous choose to show it. You can create all your content alee of time and choose what you lot desire students to encounter based on your schedule. You tin also ready availability conditions based on date, time, and performance on other items in the grade gradebook. On the Course Content page, students tin can see when the document is set to be available.
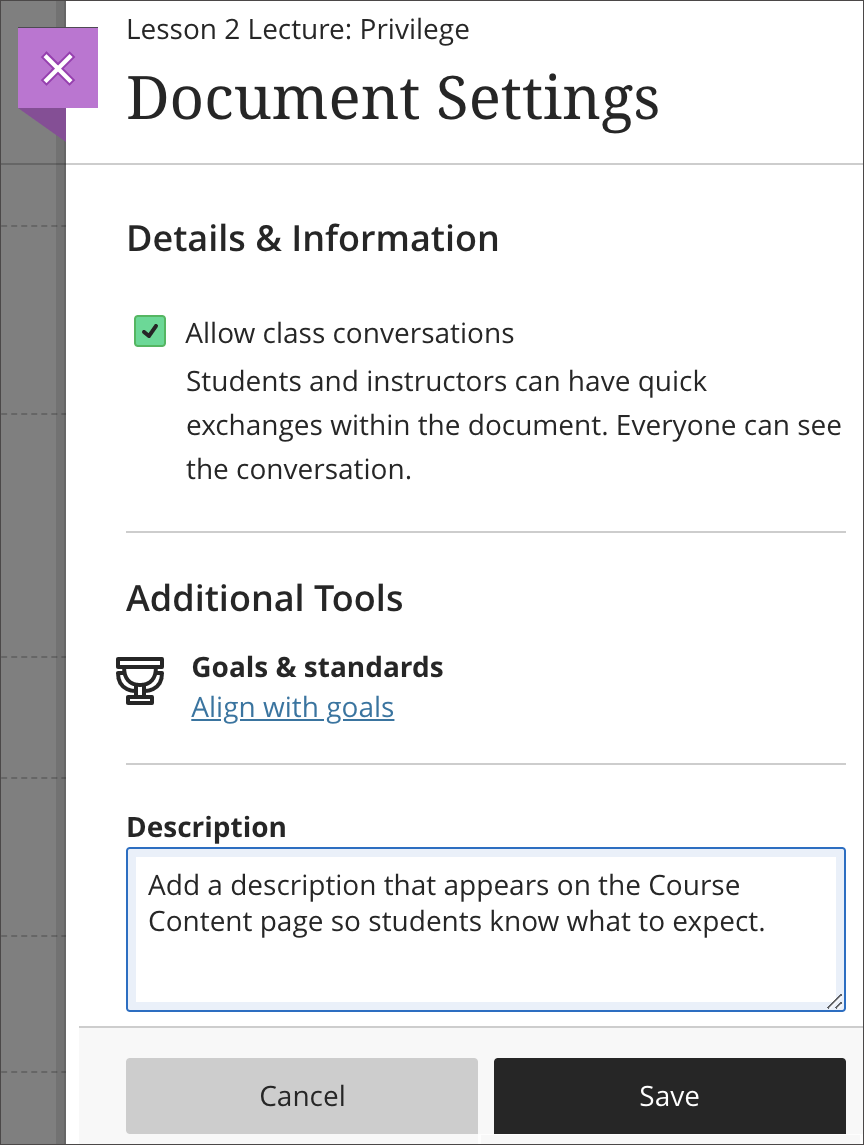
- Allow class conversations. What if your students have questions? You can allow conversations inside a document, and anyone tin can contribute. Select the Settings icon to open the Document Settings console and select the conversations check box. Equally the conversation develops, it appears merely with the document.
More on conversations
- Add together goals and standards. You and your institution tin use goals to measure student achievement beyond programs and curriculums. When you create a certificate, you tin can align ane or multiple goals. In the document, select the Settings icon. Select Align with goals to search for available goals to marshal with the document. Students won't be able to see the goals you align with a certificate.
More on how to align goals with grade content
- Add an optional description. The clarification appears with the document title on the Course Content page. Content item descriptions are limited to 250 characters.
Your institution needs to have an alternate domain configured for the Add HTML cake to appear. If you don't see the block, delight contact your site administrator.
Discussion count in the editor
As you lot blazon in the editor, the word count appears below the editor. Afterwards you lot save, the discussion count no longer appears.
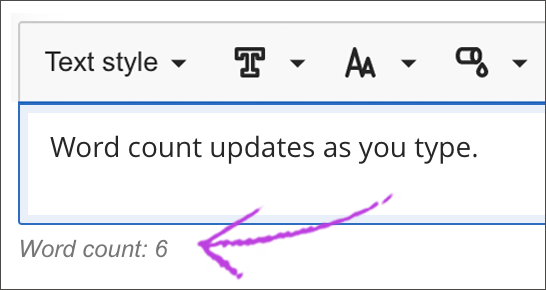
These items are included in the word count:
- Individual words
- Spider web links
- Text in bulleted or numbered lists, but the bullets or numbers themselves aren't included
- Superscript and subscript text non part of another word
These items and formatting elements don't affect the word count:
- Images, videos, and file attachments
- Math formulas
- Blank spaces and lines
- Alternative text
When you lot utilise punctuation to attach words or numbers, the count is affected. For example, "We went...without you" is counted every bit 3 words. The words or numbers on either side of the punctuation are counted as i discussion.
Add together more than content
After yous add your offset piece of content, select the plus sign wherever you desire to add more content. You lot can add as many text blocks and files as you lot desire, wherever you want.
Save your document
Later yous save, the certificate appears in the content list. You can change the document's content at any time and change the guild of the items you added to the document.
In their activity streams, students are notified a new document is available.

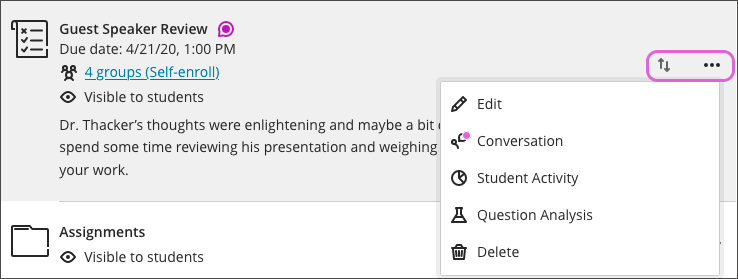
Edit, reorder, and delete documents
Y'all can make changes to existing documents and modify where they appear on your Course Content page. Printing the Move icon in a document'south row and move it to a new location. You can also move a certificate into an expanded folder.
In a document's row, open the carte du jour to select Edit, Conversations, and Delete.
You tin can utilise your keyboard to motion a document.
- Tab to an particular's Motility icon.
- Press Enter to activate move manner.
- Use the arrow keys to choose a location.
- Press Enter to drop the item in the new location.
Delete documents
You lot tin delete a document from your form or hide information technology from students to preserve the information. Students can't admission subconscious documents on the Class Content page.
Edit documents and media files
Based on the document element, you can move, edit, delete, or download information technology.
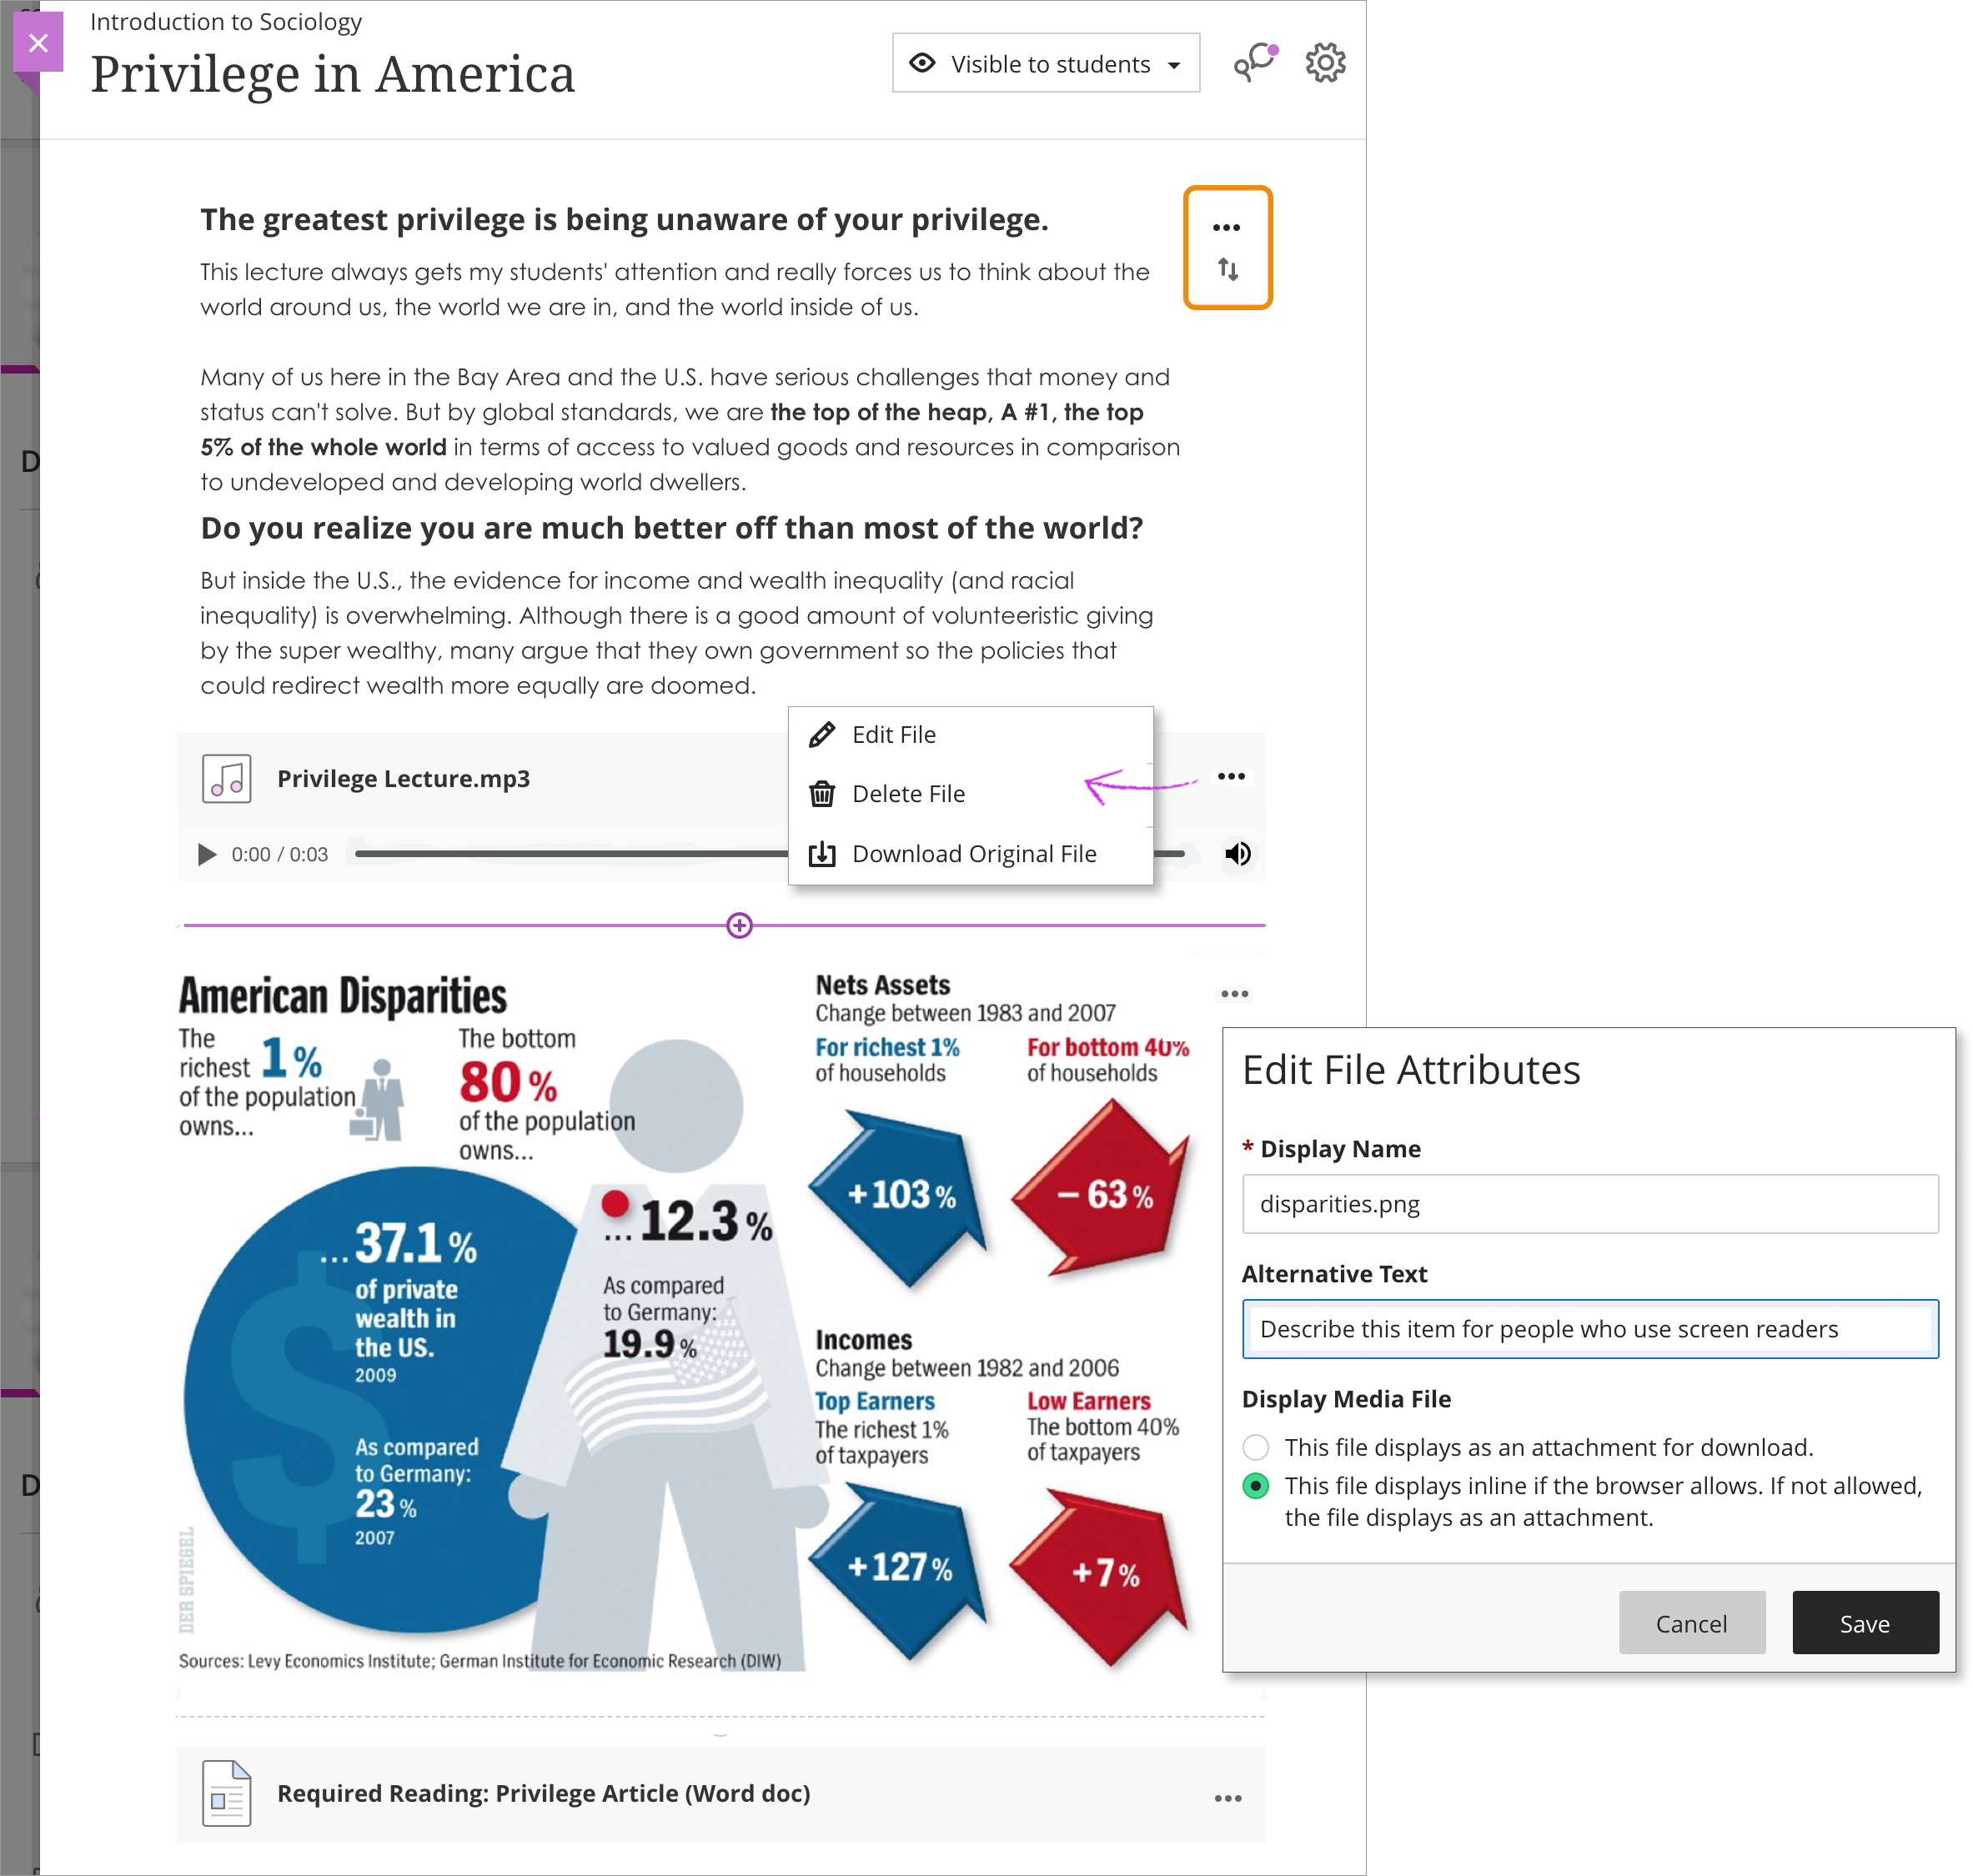
Open up an element's card to admission the options. Press the Move icon to motility an element to a new location on the document folio.
Select the plus sign wherever y'all want to add together another file or text block on the document folio.
Media viewing options
If your browser allows, media files you add to documents display inline by default. If your browser tin can't display a media file inline, it appears as an attachment.
Images that brandish inline are embedded in a 768-pixel block at the biggest breakpoints. The closer to that size the images are, the less padding appears around them.
Yous can likewise add alternative text to describe images you add together. Alternative text is read aloud by screen readers and helps describe what some users can't come across.
You can edit the file's settings, including the display proper noun, alternative text, and brandish behavior. Choose whether to insert the file as a link in the editor or to embed the file directly then information technology appears inline with other content you lot've added. To edit the file's culling text or display behavior, select the file in the editor and then select the Edit Zipper icon.

In most browsers, you can select where the files that you open in courses are downloaded. For example, in Chrome, navigate to Settings > Advanced > Downloads. You tin can select the location for file downloads and choose if you desire the browser to enquire each time. In Safari, y'all have the same capabilities. Navigate to Preferences > Full general > File download location. You tin can perform an internet search to learn about file download choices in other browsers.
What happens during copy and import?
You lot can import a course or re-create all the content from ane of your courses on the organisation into another course. The new content is added to the end of the content list of the form yous're in.
More on importing content
More than on copying a course
More on copying content from other Ultra courses
When you import Original content or cull to preview your Original course in the Ultra Course View, content items are converted to Ultra documents. All text, attachments, and links that yous added in the editor are converted and media files volition open up inline past default. Files that you added equally attachments in the section after the Original editor are grouped together in alphabetical order at the end of the Ultra document. Media files will open inline past default. You can edit images, video, and audio files to alter the default and change whatsoever file's title. Students volition need to download some file types to view them.
More on Original content items
Review the document as yous may see some loss of formatting during the conversion process. For case, if you lot added a championship for i of your files in the Original Grade View, the title may not appear in Ultra. You tin edit the file to modify the file proper name. You can reorder the items in the document as needed.
broderickpura1945.blogspot.com
Source: https://help.blackboard.com/Learn/Instructor/Ultra/Course_Content/Create_Content/Create_Course_Materials/Create_Content_Items_or_Documents
0 Response to "How to Upload a Document to Blackboard"
Post a Comment